
Imagine a dedicated woodworker standing over a workbench, admiring a beautiful, jagged slab of raw black walnut. The vision is ambitious: a custom “river table” where a shimmering vein of liquid glass flows through the heart of the timber. After days of sanding and prep, the moment of truth arrives. They mix a large batch of resin, pour it into the mold, and wait with baited breath. But 48 hours later, anticipation turns to heartbreak. The center of the table has transformed into a smoking, cracked plastic block. Thousands of tiny, trapped air bubbles cloud the wood grain. The bottom remains a gummy, sticky disaster that stubbornly refuses to harden.
This “epoxy nightmare” is the reality for many artisans who treat this advanced industrial material like ordinary craft glue. The truth is that using a good woodworking epoxy requires a shift in mindset from art to chemistry. Epoxy is a thermosetting polymer—a man-made substance that transforms from a liquid into an incredibly rigid, three-dimensional molecular network through an exothermic chemical reaction called polymerization. When strength, durability, and a glass-like finish matter most, understanding the science behind the pour is what separates professional results from expensive waste.
Whether you are seeking epoxy desk ideas or repairing structural cracks, here are the professional secrets to mastering your next project.
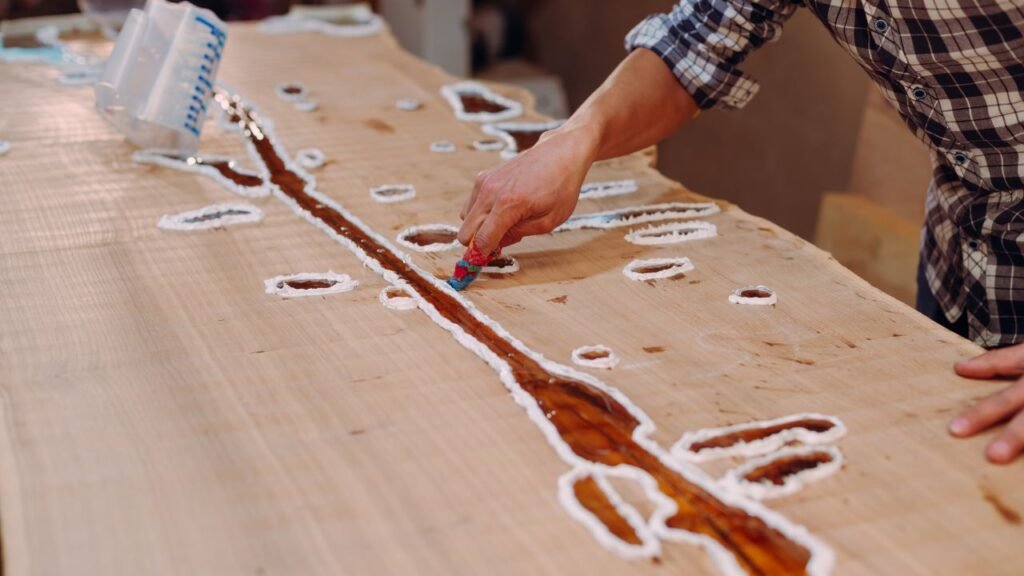
1. Choosing the Best Epoxy for Woodworking Projects
The most fatal mistake a beginner can make is assuming one resin fits every project. In the world of wood and resin projects, the material’s formulation dictates its maximum pour depth and curing speed.
- Deep Casting Resins: Specifically designed for wood epoxy projects like river tables or charcuterie boards, these allow for pours up to 2 or 3 inches thick in a single pass. They cure slowly to allow heat to dissipate safely, preventing a “flash cure” that could melt your mold or crack your project.
- Tabletop & Finishing Resins: These are wood finishing epoxy systems engineered for thin “flood coats” of about 1/8 to 1/4 inch. They are self-leveling and cure much faster than deep pour resins, making them ideal for protective coatings on bar tops and furniture.
- Repair & Joinery Epoxies: If you need an epoxy wood glue for structural repairs or wood carving, high-viscosity “quick set” formulas are your best friend. Products like Loctite Epoxy Quick Set reach usable strength in just one hour and are perfect for anchoring bolts or filling small knots.

2. The Absolute Precision of the Mix Ratio
When working with woodworking epoxy resin, there is no such thing as “close enough”. Unlike polyester resins that use a catalyst to speed up drying, epoxy requires an exact stoichiometric balance between the “A side” (resin) and the “B side” (hardener). Most high-quality systems require a 2:1 or 4:1 ratio by volume or weight.
To achieve a strongest woodworking epoxy bond, absolute precision is mandatory. Professional shops use highly accurate digital scales for weight-based systems or calibrated pumps that deliver equal parts every time. If the ratio is even slightly unbalanced, the molecules will physically fail to cross-link. You’ll be left with a permanent, sticky mess that ruins the wood and costs you a fortune in wasted material.

3. Sealing the Grain: The Secret to Clarity
A common frustration in wood projects with resin is “grain bleed,” where air escapes from the porous wood and creates endless bubbles in the curing resin. To prevent this, professional fabricators always “seal” the wood first.
By brushing a thin “seal coat” of clear epoxy over the raw wood grain, you create an impermeable barrier. This coat must be allowed to fully cure or reach a tacky “gel state” before the main pour. This simple step ensures that your good woodworking epoxy stays crystal clear, highlighting the wood’s natural beauty rather than obscuring it with a cloudy, frothy haze.
4. Temperature: The Invisible Success Factor
Temperature is the primary engine of the epoxy reaction. The ideal environment for a wood epoxy pour is between 70°F and 75°F (21°C to 24°C).
- If it’s too cold: The resin will become too thick to release air bubbles and may stall the curing process entirely.
- If it’s too hot: The exothermic reaction will accelerate out of control. This concentrated heat can cause the resin to smoke, yellow, or instantly harden into a useless, cracked block.
A professional trick to managing air bubbles is a 40°C warm water bath. By submerging your sealed resin bottles in warm water for 10 minutes before mixing, the liquid becomes thinner, allowing air to rise and escape effortlessly.

5. Exploring Creative Epoxy Art Ideas
The versatility of epoxy and wood has birthed entire industries of epoxy resin furniture and epoxy furniture ideas.
- Coloring Your Project: You can customize your pour using translucent dyes for a glass-like look, or pearlescent mica powders for a swirling, metallic sheen. The “8% rule” is the law here: never add more than 8% pigment by volume, or you will block the molecules from bonding and ruin the cure.
- Encapsulation: From glowing LED lights to river rocks and coffee beans, epoxy art ideas are only limited by your imagination. Just remember that every object you submerge creates new pockets for trapped air, requiring extra attention with a propane torch or heat gun to pop surface bubbles.
- Woodturning & Carving: A good woodworking epoxy is often used in epoxy for woodturning to stabilize soft, “punky” wood or to create stunning hybrid blanks for pens and handles. Once fully cured, high-performance resins are machinable, meaning they can be sanded, drilled, and turned on a lathe just like hardwood.

6. Finishing and Safety Rules
Working with cured epoxy is effectively like working with plastic. When you sand or plane your finished epoxy resin furniture, you are throwing microscopic plastic particles into the air.
A good woodworking epoxy workflow must include a high-quality respirator. Don’t rely solely on dust collection; an added layer of protection is vital to prevent inhaling plastic dust that can cause respiratory issues. Once sanded up to 320 or 400 grit, the surface can be polished to a mirror shine or finished with a protective topcoat to prevent “chalking out” or yellowing under UV sunlight.
Conclusion: Transform Your Workshop Today
Choosing a good woodworking epoxy is an investment in your craft. By respecting the chemistry of the pour—accurate ratios, temperature control, and proper grain sealing—you can stop gambling on “close enough” and start producing pieces that last for decades.
Don’t let your artistic vision be ruined by low-grade materials that yellow, bubble, or fail to cure. The quality of your final glass-like masterpiece is only as good as the supplies you use.
Equip your studio with professional-grade gear: high-precision digital scales for perfect ratios, premium low-odor resins like TotalBoat Fathom or ecopoxy, and brilliant mica powders that blend without clumping.
Explore our full collection of professional woodworking epoxy and tools today. Stop guessing, start measuring, and transform your liquid imagination into an unbreakable, permanent reality